Generally speaking, we think that Web1.0 is an application that uses a user name and password to log in, while Web2.0 uses a third party to log in, such as Facebook, Google, wechat, etc., while Web3 uses a wallet to log in, and all the value generated by a user belongs to the user.

So what exactly is Web3.0 like? Next, let's use a simple example to experience how to develop a complete Web3.0 website application.
Contract
First, open the terminal, create a directory named hello-web3, and initialize hardhat under this directory:

Hardhat is a complete local development suite of Ethereum, through which we can test and deploy smart contracts.
Here, we choose to create a project of sample type. For others, just keep the default configuration. After initialization, we can use vscode to open the project directory. The default project structure is shown in the following figure:

First, remove the files under the contracts and scripts directories of the project. We will start writing a smart contract from 0. Create a counter.sol file. . Sol is the suffix of the file name of the solidity language, and then we can start to write code in this file. Generally, the contract will have a copyright statement at the beginning, and then define the version number of using solidity. For the convenience of testing, we will also import console. log() Toolkit:

From the above code usage habits, we can see that solidity is similar to JavaScript.
Next, we can define the contract and use the contract keyword. For example, here we define a contract named counter, and define a state variable named counts in the contract to save the counter data. Then we use constructor() to define a constructor and initialize the count variable to 0 in the function body, However, the well-known this keyword is no longer required when obtaining the definition variables:

One of the functions we want to achieve is that the user clicks a button on the front page and the counter will be +1. Therefore, in addition to the above variable definitions, we also need to define a counter increment function add (), also need to get the counter data, and also need to define a function getcounts ():

When defining a function, we added a public keyword after the function name, indicating that the current contract function can be called externally. Another function added a view keyword when obtaining the variable value, indicating that the function only reads data and does not involve transactions (it can be understood that calling this function does not cost gas fee).
So far, our first simple smart contract has been written. The complete contract code is as follows:

Test
After the smart contract is written, we need to test the contract.
First, add a new directory named run.js file, in which a main function is defined. Note that the async keyword should be added. Because many statements in the function need to wait for execution, we usually use the async/await mode to write. First, get the smart contract counter, and then deploy the contract to the blockchain. Since it takes a while to go up the chain, we generally need to add a code to judge whether the deployment is complete, It is used to ensure that the smart contract deployment is completed. After the deployment, we can get the contract address. The code is as follows:

Here, we use the HRE package when obtaining the contract, but do not display the import. HRE is the abbreviation of hardhat runtime environment. In the later test, we will use the hardhat tool to execute the script. HRE will be directly imported into the environment, so there is no need to declare.
Next, we need to execute the above main() function, print success after success, and output an error message if failure:

Next, we switch to the terminal and execute the file with the following command:

The contract will be compiled and then executed. After execution, the contract address will be displayed. We can try to execute it again. Since the contract is not executed through the node, the contract address is the same. However, during formal deployment, the contract address will be different each time:

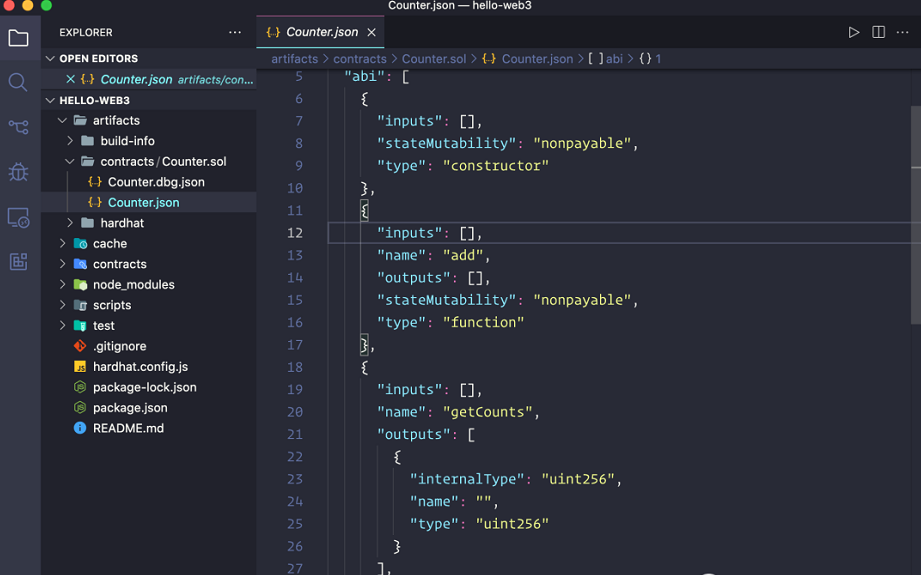
Now that we return to the project, we can find that there is an additional directory named artifacts, which contains multiple files generated during compilation. The more important one is contracts/counter.sol/ Counter. json file, which contains the compiled code of the smart contract counter and the function name in the contract. We will also use this file later.
Then we use another method to conduct the local test. Open a new terminal and run the NPX hardhat node command. This command will run a local node and provide 20 wallet addresses and private keys. Each wallet provides 10000 eth for the test:
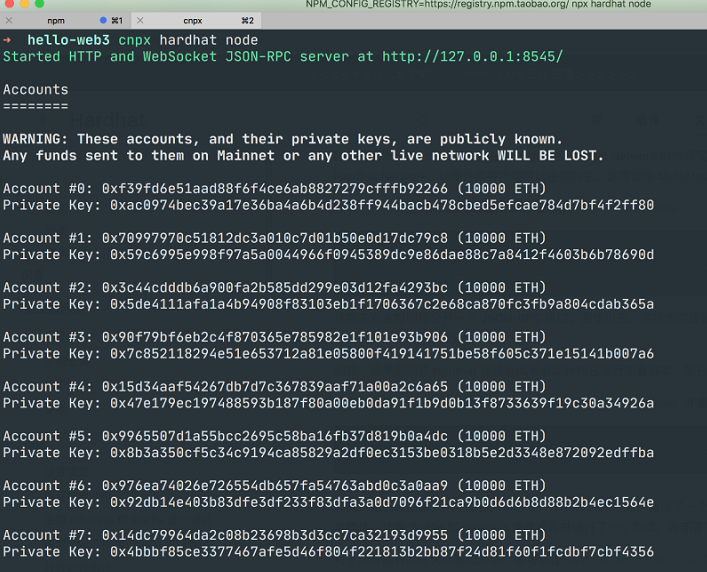
The above command will expose a json-rpc service. To use it, you can connect the wallet or application to http://localhost:8545 Address.
It should be noted that these private keys can also be used in the real environment, but these private keys are public, so do not use them in the real environment and do not transfer real assets to the wallet.
Now we deploy our contract to the node started above. Just add --network localhost after the run command:

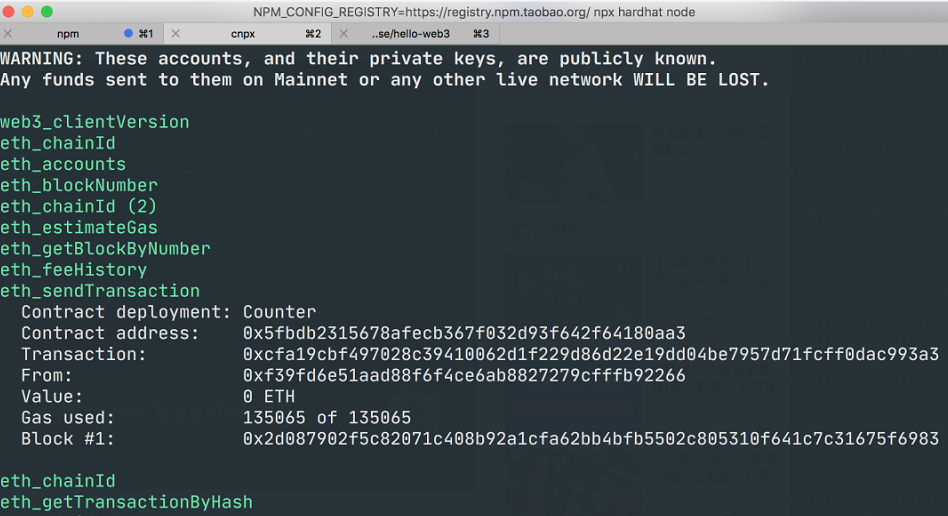
After the deployment, you can see that a counter smart contract has been successfully deployed in the previous node terminal, and some gas costs have been spent:
If we redeploy again, we can find that the contract address has changed:

Each redeployment will generate a new contract address, so the contract cannot be updated. Only one new contract can be deployed, which is why a lot of tests must be done before the formal deployment to the online.
Now that the contract has been successfully deployed and run, let's try to execute the two functions defined in the contract above, also in run.js file add the following code to the main function :
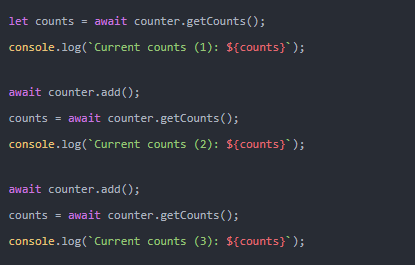
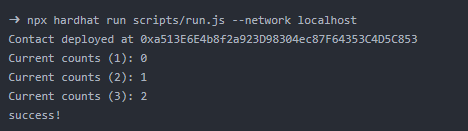
First, call the getcounts() function to obtain the values of counts, then call the add() function of the contract to add 1 to the values, and then re obtain and print them. A total of 3 times are obtained before and after that, and then re run the file:
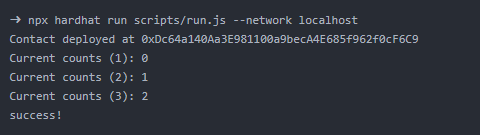
We can see that the results are output three times, which is in line with our expectations. Back to the terminal of the node, we can see that the first record is the deployment contract, which costs some gas fees. Then we execute the contract and call counter#getcounts. After the execution is completed, we continue to call counter#add:
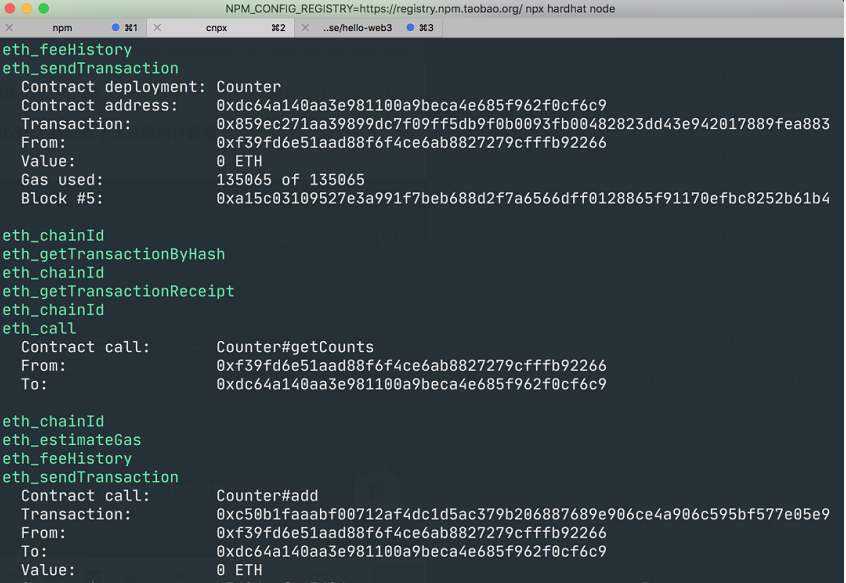
As can be seen from the figure, there is a difference between executing add() and getcounts(). Executing add() is a transaction that needs to modify the value of counts, so it needs to pay some gas fees to go up the chain, while getcounts() only reads the value of counts and does not need to be modified. It is not a transaction, so it does not need to spend gas fees.
So far, we have basically completed the smart contract test of counter.
Website
After the contract development is completed, we need to develop a website to interact with our contract. Here we use react to create a simple website.
Use create-react-app to create a react project named react-hello-web3:

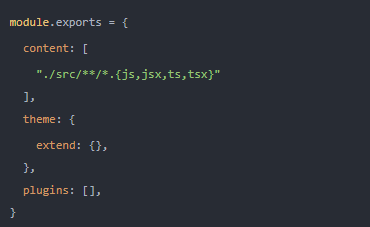
Then install tailwindcss:

The above command will generate tailwind Config.js file. To open a project using vscode, you need to Config.js file. The file contents are as follows:
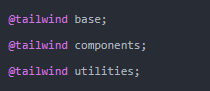
In addition, we also need to add tailwind to CSS, and add the instructions of each layer of tailwind to./ Src/index.css file:
Then you can start the service:

After startup, the project website will be opened in the browser by default, as shown in the following figure:
Now we will remove the contents in the./ Src/app.js file , and the tailwind method is used to set the content style. The following contents are added:

The classname style in the above code is provided by tailwind, and we can use it directly. Now our website should look like the following figure:
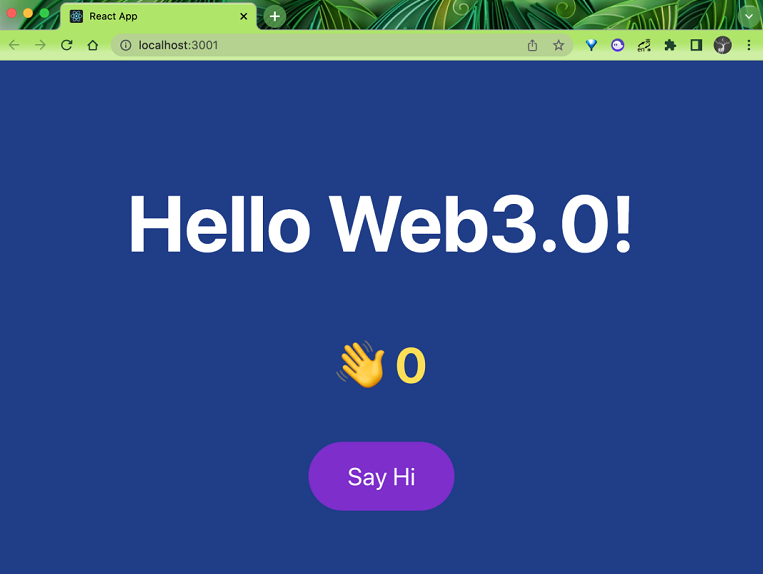
When we click the say hi button, we will interact with the above contract, call the add() function to add 1 to the counts, and then display the value on the above. This is the basic function of the website we developed.
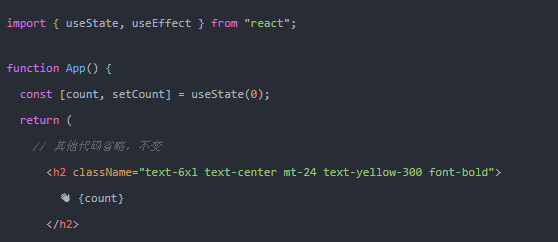
Then on app JS file. Here, we use react hooks to manage the state, define the state of count and setcount in app (), initialize them to 0, and then replace 0 in the template with count:
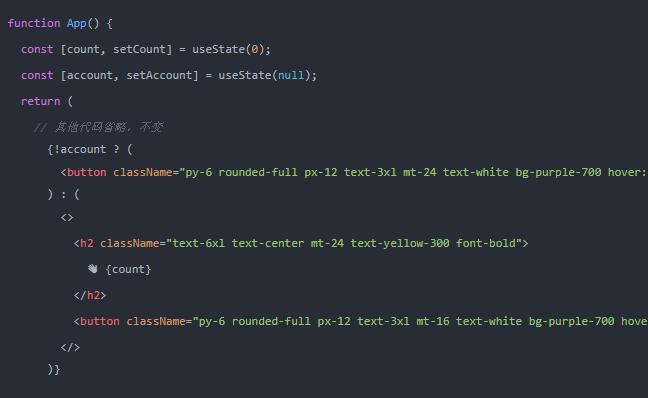
There should be no change in our website. Next, we need to determine whether the user has logged in using the wallet. First, define the state of account and setaccount, which are initially null, and then judge in the template. If there is no login, the connect wallet button will be displayed. If there is login, the quantity and plus one button will be displayed
This involves a wallet. At present, the most popular wallet is called metamask. You need to use Chrome browser. You must be careful not to install fake wallets (there are many fake wallets now), which will steal your encrypted assets. You can install them through the official website. Metamask is actually a browser plug-in:
After installation, create a new wallet and set an unlock password. However, this is not the most important thing. The most important thing is not to lose your wallet private key. Anyone can get your wallet through your private key. After the bip39 proposal, you can import your wallet by using mnemonic words. It will give you 12 English words. You can restore your wallet by entering these 12 words in sequence, Moreover, multiple wallets can be generated under a mnemonic word, and multiple wallet private keys can be kept. Therefore, mnemonics must also be safe and must be well kept.
After installation, click the image in the upper right corner and click Import account in the pop-up menu to enter the entry of the import account. By default, the private key is imported. The private key can be imported by filling any one of the 20 wallet addresses generated in the node started by the NPX hardhat node command above:
After successful import, you can see your encrypted assets. However, what you see now is in the formal environment, so you must not transfer real assets into this wallet:
Then we need to set the local network. In the settings - > Network - > localhost 8545 network option, change the chain ID to 31337, which meets the requirements of hardhat:
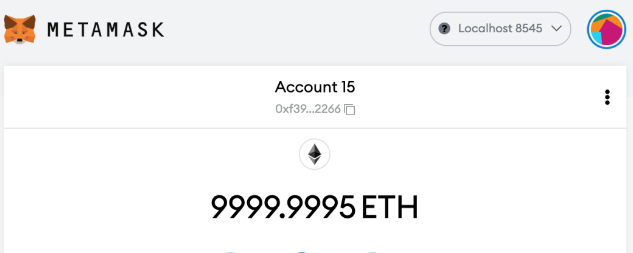
After the configuration is completed, you can switch to the localhost network to see 10000 eth assets:
Remember that the deployment and call of the add() function will consume part of the gas cost when we test the contract. Now let's execute it again:
Then switch to the node terminal to view the transaction information. It does consume gas fees. Switch to the wallet again to view that there is already a part of eth missing. Note that the first wallet in the local node is used by default:
Here we have prepared the wallet, and then switch back to the react project. We need to connect the wallet. First, we need to install a JavaScript library called ethers. Ethers is a very convenient Web3 development framework for us to call Web3 API.

On app.js defines a function called checkifwalletconnected to determine whether a wallet is connected:
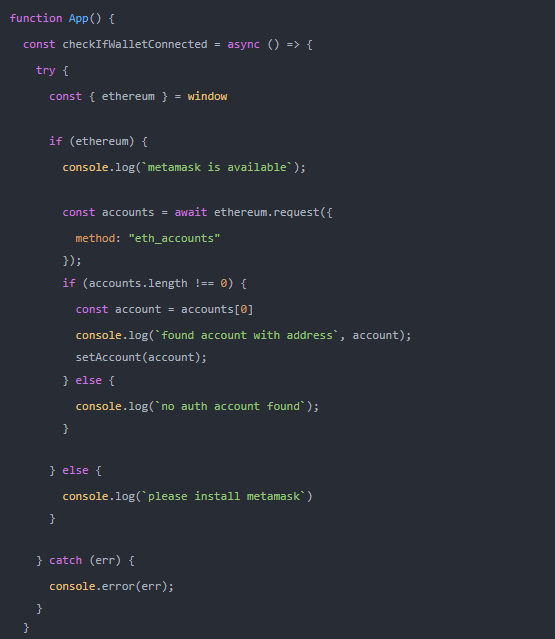
In the above function, we obtain the Ethereum object from the global object window, which is injected by the metamask wallet. If it does not exist, it is proved that the wallet is not installed. After obtaining the Ethereum object, you can call ethereum Request ({method: "eth-accounts"}) to obtain the wallet address. If the wallet is authorized to connect to the website, you can obtain the wallet address. After obtaining the wallet address, you can save it through setaccount.
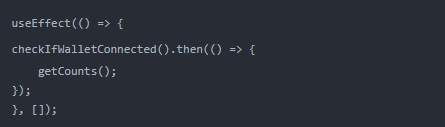
Next, we can execute the above function once when the page is loaded by using useeffect() and a blank array, which is similar to the usage of componentdidmount:

Then add an onclick event on the connect wallet button to perform the operation of connecting the wallet:
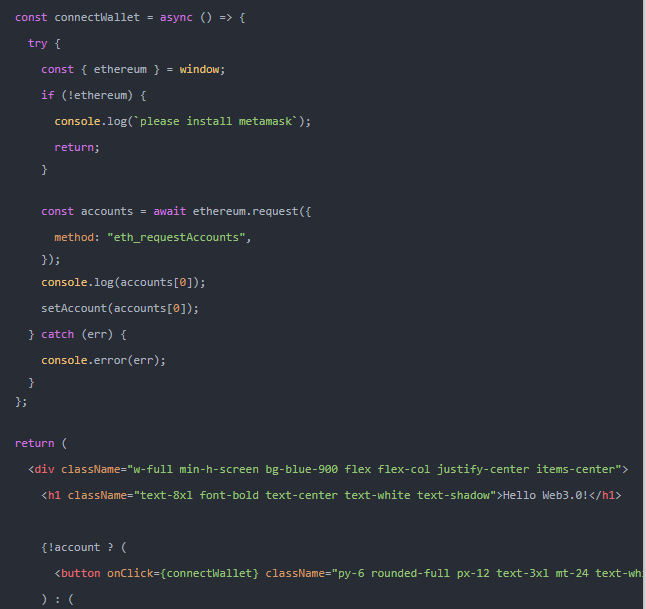
In the function to connect the wallet, you also first determine whether the Ethereum object exists, and then call ethereum Request ({method: "eth-requestaccounts"}) to request wallet authorization. After authorization, save the first wallet address to account.
Now, after clicking the connect wallet button on the page, a pop-up window will pop up to request wallet authorization. We can see that multiple choices can be made at this time, so the accounts obtained in the code are an array, and we only need to obtain the first wallet address:
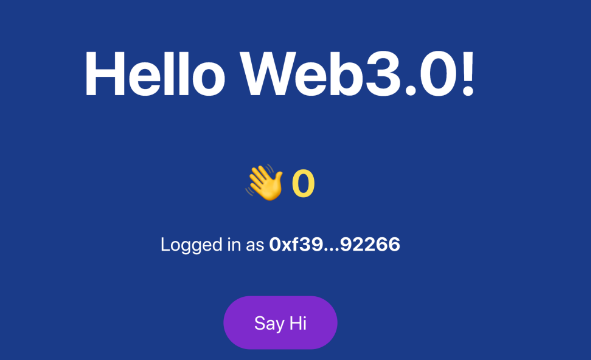
Then on the page, we will display the address of the wallet and add the template code as shown below. Because the wallet address is relatively long, only part of the information will be displayed:

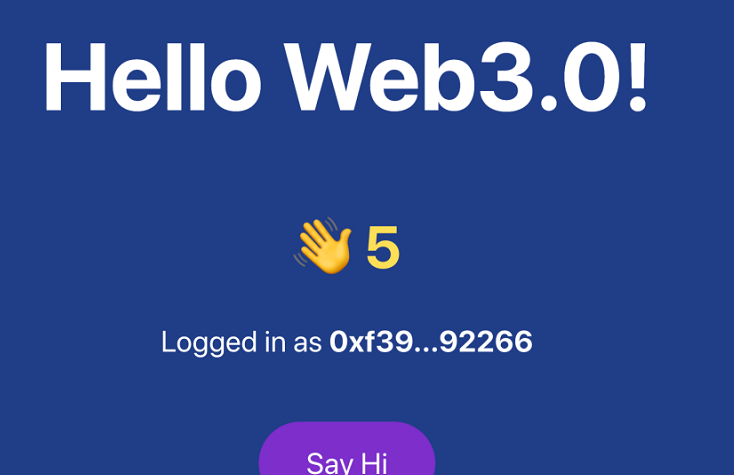
The rendering of the website after connecting the wallet should be as shown in the following figure:
Next, process the logic of the say hi button below, and add the onclick event and the corresponding processing function sayhi on the button.
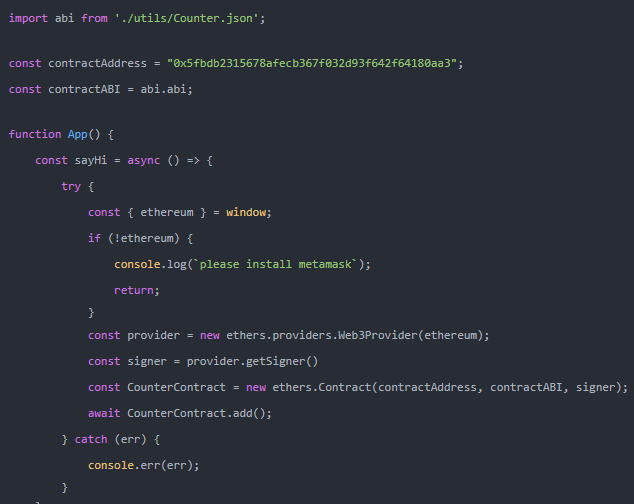
In this function, the logic we want to implement is to call the add() function of the contract to implement the operation of adding 1. First, we need to obtain a provider through Ethereum, and then obtain a signer through this provider. Signer is the signatory executing the contract, and then we can use ethers.contract is used to instantiate the contract object of a counter. Here, three parameters, contract address, contract ABI and signer, need to be passed in. The contract address can be viewed from the node terminal. The ABI of the contract is the counter.json compiled by harhat . We copy the file from the smart contract project to the project ./ Utils/counter.json, you can directly obtain the ABI after import. Now you can directly call the add () function in the contract.
Now let's go to the website and click the say hi button. A transaction window will pop up in the wallet, prompting the required gas fees. If we agree, we can execute the contract by confirming:
After confirmation, you can see the transaction execution process of calling the add() contract in the node terminal:
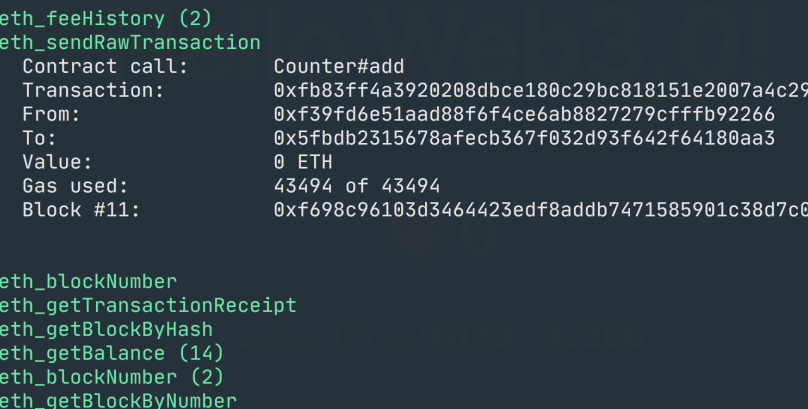
You can also see relevant information about this transaction in your wallet:
However, we confirm that there is no change on the website after the transaction, and the displayed data is still 0. This is because we do not get the latest value. We define a getcounts() function to get the latest value, and the code is as follows:
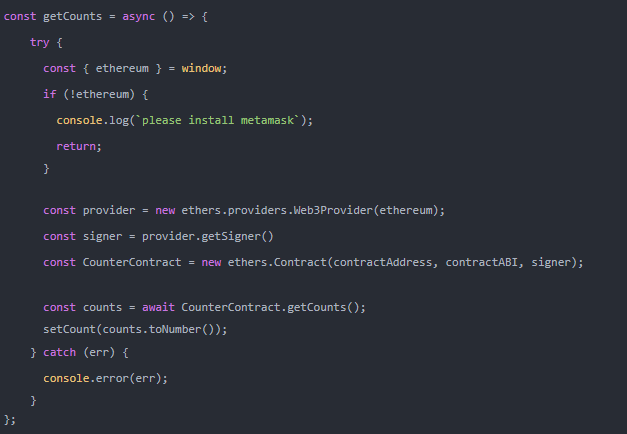
The operation mode here is basically the same as that in the sayhi() function, except that the getcounts() function in the contract is called. After obtaining the data, it needs to be converted through tonumber(), otherwise an overflow error will occur. After the definition is completed, we can obtain the data after checking the wallet in useeffect:
Similarly, after the operation of adding 1, you can call the getcounts() function again to obtain the latest data:
It should be noted that getcounts() cannot be called immediately after calling the add() function of the contract. A transaction object will be returned after the contract transaction is completed. Here, It is normal for the txt.wait () operation to wait for the add () action to complete the chaining before obtaining the latest value.
Now when we click the say hi button, the value on the page will also display normally after confirmation in the pop-up wallet transaction window:
Here our website logic is completed. The complete code is as follows:
import { ethers } from "ethers";
import { useEffect, useState } from "react";
import abi from './utils/Counter.json';
const contractAddress = "<replace your contract address>";
const contractABI = abi.abi;
function App() {
const [count, setCount] = useState(0);
const [account, setAccount] = useState(null);
const [balance, SetBalance] = useState(null);
const [isLoading, setIsLoading] = useState(false);
const checkIfWalletConnected = async () => {
try {
const { ethereum } = window
if (ethereum) {
console.log(`metamask is available`);
const accounts = await ethereum.request({
method: "eth_accounts"
});
if (accounts.length !== 0) {
const account = accounts[0]
console.log(`found account with address`, account);
setAccount(account);
//
getCounts();
} else {
console.log(`no auth account found`);
}
} else {
console.log(`please install metamask`)
}
} catch (err) {
console.error(err);
}
};
const connectWallet = async () => {
try {
const { ethereum } = window;
if (!ethereum) {
console.log(`please install metamask`);
return;
}
const accounts = await ethereum.request({
method: "eth_requestAccounts",
});
console.log(accounts[0]);
setAccount(accounts[0]);
getCounts();
} catch (err) {
console.error(err);
}
};
const getCounts = async () => {
try {
const { ethereum } = window;
if (!ethereum) {
console.log(`please install metamask`);
return;
}
const provider = new ethers.providers.Web3Provider(ethereum);
const signer = provider.getSigner()
const CounterContract = new ethers.Contract(contractAddress, contractABI, signer);
const counts = await CounterContract.getCounts();
setCount(counts.toNumber());
} catch (err) {
console.error(err);
}
};
const sayHi = async () => {
try {
const { ethereum } = window;
if (!ethereum) {
console.log(`please install metamask`);
return;
}
setIsLoading(true);
const provider = new ethers.providers.Web3Provider(ethereum);
const signer = provider.getSigner()
const CounterContract = new ethers.Contract(contractAddress, contractABI, signer);
let tx = await CounterContract.add();
await tx.wait();
await getCounts();
setIsLoading(false);
} catch (err) {
console.error(err);
setIsLoading(false);
}
};
useEffect(() => {
checkIfWalletConnected();
}, []);
return (
<div className="w-full min-h-screen bg-blue-900 flex flex-col justify-center items-center">
<h1 className="text-8xl font-bold text-center text-white text-shadow">Hello Web3.0!</h1>
{!account ? (
<button onClick={connectWallet} className="py-6 rounded-full px-12 text-3xl mt-24 text-white bg-purple-700 hover:scale-105 hover:bg-purple-600 transition">Connect Wallet</button>
) : (
<>
<h2 className="text-6xl text-center mt-24 text-yellow-300 font-bold">
👋 {count}
</h2>
<h3 className="text-3xl text-center text-white text-hold mt-12">
Logged in as{" "}
<strong>{`${account.substring(0, 5)}...${account.substring(account.length - 5)}`}</strong>{" "}
{balance}
</h3>
<button onClick={sayHi} className="py-6 rounded-full px-12 text-3xl mt-16 text-white bg-purple-700 hover:scale-105 hover:bg-purple-600 transition">
{
isLoading ?
(<svg className="animate-spin -ml-1 mr-3 h-5 w-5 text-white" xmlns="http://www.w3.org/2000/svg" fill="none" viewBox="0 0 24 24">
<circle className="opacity-25" cx="12" cy="12" r="10" stroke="currentColor" strokeWidth="4"></circle>
<path className="opacity-75" fill="currentColor" d="M4 12a8 8 0 018-8V0C5.373 0 0 5.373 0 12h4zm2 5.291A7.962 7.962 0 014 12H0c0 3.042 1.135 5.824 3 7.938l3-2.647z"></path>
</svg>)
: ("Say Hi")
}
</button>
</>
)}
</div>
);
}
export default App;
Deploy
Once you are ready to share your DAPP with others, you may want to deploy it to the online network so that others can access your app remotely.
If you want to process real online assets in your application, you need to deploy to the main network and some other test networks, such as ropsten, Kovan, rinkeby, goerli, and so on. From the software level, the only difference between deploying to the test network and the main network is which network you are connected to. We only need to specify the network through --network when executing the previous deployment script:

For example, now that we want to deploy to the test network of goerli, we needto add a network configuration to the hardhat.config.js file, as shown below:
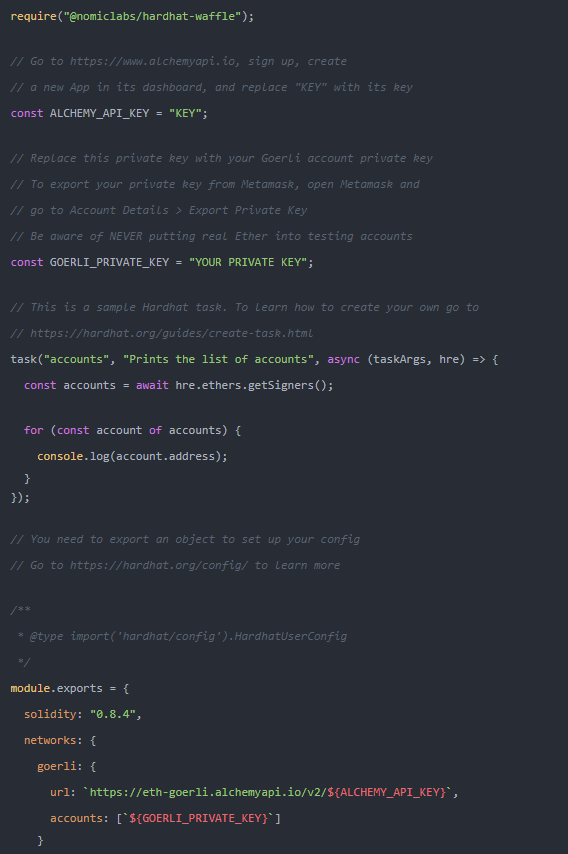
We need to go to the website https://www.alchemyapi.io Register an account, create an Ethereum app, select the goerli network, and replace the obtained key:

Then replace goerli with the wallet private key obtained previously_ Private_ Value of key. It should be noted that to deploy on goerli, you need to send the goerli-eth to the address to be deployed. We can get some eth for the test network from the faucet. The faucet is a free distribution test eth goerli faucet address https://goerli-faucet.slock.it Before the transaction, the network of metamask needs to be changed to goerli.

If everything goes well, you should see the deployed contract address, and then replace the contract address in the react application.